User Guide
Contents
- Installation
- First Launch
- The Interface
- Running Scripts
- Favourites
- Search / Filter
- Script Details
- Hiding Scripts
- Script Notes
- Run with Arguments
- Sorting Scripts
- Settings
- Script Sources
- Update Dependencies
- Quick Launch Bar
- Repeat Script on Double-Click
- System Tray
- Themes
- GitHub Token
- Writing Your Own Scripts
- In-App Help
- Keyboard Shortcuts
- Troubleshooting
Installation
- Download the latest
CatiaMenuWin32.exefrom the releases page - Place the
.exeanywhere on your machine — no installer required - Double-click to run
Requirements:
- Windows 10 or later
- Python 3.9+ — install from python.org
- PyCATIA — install via
pip install pycatia(or use ↓ Deps in the app) - CATIA V5 — must be running for scripts that interact with it
First Launch
On first launch the app will:
- Create
%APPDATA%\CatiaMenuWin32\to store settings and cached scripts - Attempt to auto-detect your Python installation
- Sync scripts from the built-in
KaiUR/Pycatia_Scriptsrepository - Display the scripts as clickable buttons organised by tab
If the sync fails with “Connect to internet to sync”, check your internet connection. If you are on a corporate network see the GitHub Token section.
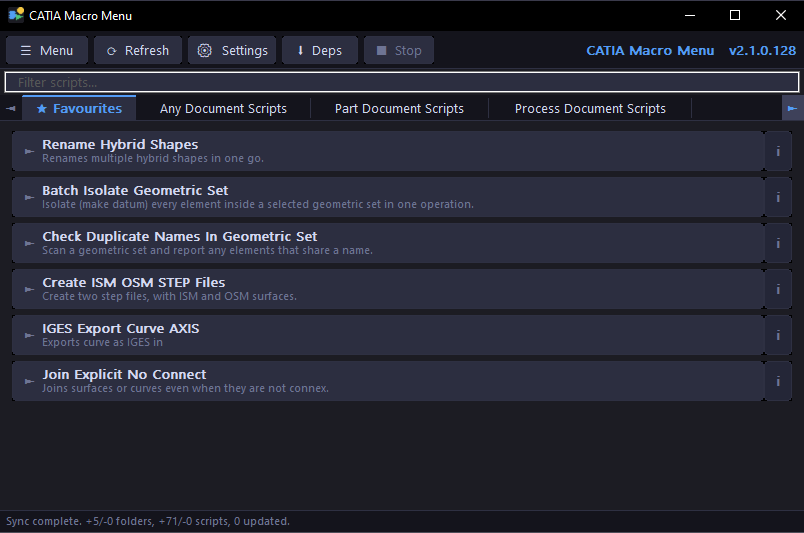
The Interface
┌──────────────────────────────────────────────────────────────────┐
│  CATIA Macro Menu                                      -  [ ]  x │
├──────────────────────────────────────────────────────────────────┤
│  [Menu] [Refresh] [Settings] [Deps] [Stop] [Log]    v2.2.0.xxx   │
├──────────────────────────────────────────────────────────────────┤
│  Filter scripts...                                               │
├──────────────────────────────────────────────────────────────────┤
│ <  * Favourites  |  Any Document Scripts  |  Part Doc Scripts  > │
├──────────────────────────────────────────────────────────────────┤
│  >  Rename Hybrid Shapes                                    [i]  │
│     Renames multiple hybrid shapes in one go.                    │
│  >  Batch Isolate Geometric Set                             [i]  │
│     Isolate every element in a geometric set as a datum.         │
│  >  Check Duplicate Names In Geometric Set                  [i]  │
│     Scan a geometric set for elements that share a name.         │
│                                                                  │
├──────────────────────────────────────────────────────────────────┤
│  Sync complete. +5/-0 folders, +71/-0 scripts, 0 updated.        │
└──────────────────────────────────────────────────────────────────┘
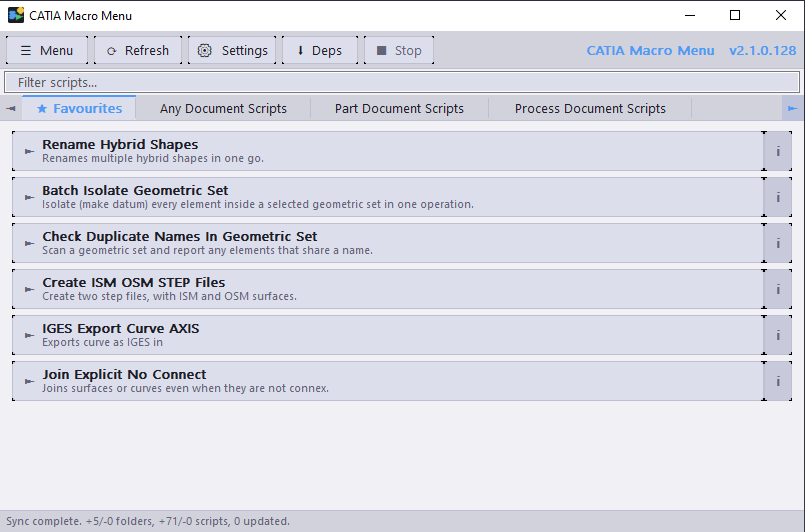
Dark Mode
Light Mode
Toolbar buttons:
- ☰ Menu — access all app functions via dropdown menus
- ↺ Refresh — re-sync scripts from all sources
- ⚙ Settings — open the settings dialog
- ↓ Deps — install/update Python dependencies
- ■ Stop — terminate the currently running background script (grayed out when idle; red when active)
- ≡ Log — open the script output log window to view stdout/stderr from background script runs
Tab bar:
- Each tab corresponds to a script folder
- Click a tab to switch between script categories
- When there are more tabs than fit, ◄ ► arrows appear — click or use the mouse wheel to scroll
Script buttons:
- Click the main area to run the script
- Click the i badge on the right to see script information (purpose, author, version, description)
Running Scripts
Click any script button to run it. The app will:
- Verify the script’s SHA hash against GitHub to confirm it hasn’t been tampered with
- Launch Python with the script path
- Show “Script launched in console” or the exit code in the status bar
When a script is running in background mode (no console), the button highlights in green — border, left accent bar, and label text — for the duration of the run. The highlight clears automatically when the script exits or is stopped.
Console options (configurable in Settings):
- Show console — opens a visible Python console window when the script runs
- Keep console open — keeps the console window open after the script finishes so you can read output and errors (
cmd /kmode)
Without Show console, scripts run silently in the background.
Stopping a Running Script
Click the ■ Stop toolbar button to immediately terminate the running script. The button is grayed out when no script is running and turns red when one is active.
Note: Only background (no-console) runs can be stopped this way. If Show console is enabled, close the console window directly, or press
Ctrl+Cinside it.
Script Output Log
When scripts run in background mode (no console), all stdout and stderr output is captured and shown in the Script Output Log window.
- Click ≡ Log in the toolbar to open the log window at any time — even before a script runs or after it finishes.
- Each run is framed by a timestamped header and a completion footer:
=== ScriptName  (HH:MM:SS) ===
... script output ...
--- Finished successfully. ---
The footer reads
--- Stopped by user. ---if the script was terminated via the ■ Stop button, or--- Exited with code N. ---for a non-zero exit. - Syntax highlighting — output is colour-coded automatically:
- Header lines (
===) → accent blue --- Finished successfully. ---→ green--- Stopped by user. ---→ amber--- Exited with code N. ---→ red- Lines containing
Error,Exception,Traceback,Fatal→ red - Lines containing
Warning→ amber
- Header lines (
- Output is buffered internally — nothing is lost even if the log window is closed during a run. Open it afterwards to see the full history.
- The log accumulates output across all runs for the session.
- The window is non-blocking and follows the current dark/light theme.
Note: Output is only captured in background mode. When Show console is enabled, output appears in the console window instead.
Script Source Tinting
When Tint local and extra-repo script buttons differently is enabled in Settings → Window (default: On), script buttons are given a subtle background tint based on their source:
| Tint | Source |
|---|---|
| Warm rose | Script is from a local folder |
| Cool green | Script is from an extra GitHub repository |
| No tint | Script is from the built-in KaiUR/Pycatia_Scripts repository |
The same tinting applies to Quick Launch Bar buttons. Disable the option in Settings → Window if you prefer a uniform appearance.
When the app is offline and Show cached scripts when offline is enabled, the tinting changes to indicate stale data:
| Tint | Source |
|---|---|
| Red | Script is from the built-in KaiUR/Pycatia_Scripts repository |
| Dark orange-red | Script is from an extra GitHub repository |
| Unchanged | Script is from a local folder (local scripts are always current) |
Local scripts are never tinted red because they are read directly from disk and are not affected by connectivity.
⭐ Favourites
Favourites give you quick access to the scripts you use most often.
To add a favourite:
- Right-click any script button → Add to Favourites
- Or open Script Details… → tick the Favourite checkbox → click OK
A dedicated ⭐ Favourites tab appears at the far left of the tab bar as soon as you have at least one favourite. It disappears automatically when all favourites are removed.
To remove a favourite:
- Right-click the script → Remove from Favourites
- Or open Script Details… → untick the Favourite checkbox → click OK
Favourites are also the source for the Quick Launch Bar — every script you favourite automatically appears as a button on the floating bar.
Favourites are stored in %APPDATA%\CatiaMenuWin32\prefs.ini and persist across restarts and syncs.
🔍 Search / Filter
A filter bar sits below the toolbar. Type any text to instantly filter the scripts in the current tab by name or purpose. Clear the box to show all scripts again.
📋 Script Details
Right-click any script button and select Script Details… to open a full details dialog showing:
- Script name, purpose, author, version, date
- Code environment and CATIA release
- Full description and requirements
- Local cache path
- Your personal note
- Favourite and Hidden toggles
Changes to the note, favourite, and hidden state are saved when you click OK.
🙈 Hiding Scripts
Hiding a script removes it from view without deleting it from the cache.
To hide a script:
- Right-click any script → Hide Script
- Or open Script Details… → tick the Hidden checkbox → click OK
Hidden scripts are not deleted — they remain in the cache and will not reappear after a sync. If every script in a tab is hidden, the tab itself disappears from the tab bar automatically.
To unhide scripts:
- Go to ☰ Menu → File → Manage Hidden Scripts
- Select one or more scripts from the list
- Click Unhide to restore the selected scripts, or Unhide All to restore everything
The tab reappears automatically as soon as any script in it is unhidden.
📝 Script Notes
Right-click any script → Add Note… (or Edit Note…) to attach a personal note to a script. Notes are visible in the Script Details dialog and stored in prefs.ini.
▶️ Run with Arguments
Right-click any script → Run with Arguments… to pass custom command line arguments when running the script.
📂 Opening Scripts
The right-click context menu provides three options for opening script files directly:
| Option | Available for | Action |
|---|---|---|
| Open Script Location | All scripts | Opens the folder containing the script in Windows Explorer |
| Open with Default App | All scripts | Opens the script file with the Windows default application for its file type |
| Open in Editor | Local folder scripts only | Opens the script in the registered editor for the file type (e.g. VS Code, Notepad++, IDLE) |
Note: For GitHub-synced scripts, edits made to the cached file will be overwritten on the next sync. Use Open in Editor on local scripts to safely edit your own scripts.
🔢 Sorting Scripts
☰ Menu → View → Sort Scripts offers four sort modes:
| Mode | Description |
|---|---|
| Default Order | Order from GitHub API or disk |
| Alphabetical | A–Z by script name |
| By Date | Most recent scripts first (from script header Date field) |
| Most Used | Scripts you run most often appear first |
The sort mode is saved in Settings and applied to all tabs.
Settings
Open via ☰ Menu → File → Settings… or the ⚙ Settings toolbar button.
The Settings dialog is organised into five tabs:
General tab
| Option | Description |
|---|---|
| Python Interpreter | Full path to python.exe. Click Browse… to locate it. Leave blank to auto-detect from PATH. To use a virtual environment, browse to python.exe inside the venv’s Scripts folder (e.g. C:\My_Venv\Scripts\python.exe) — the venv does not need to be activated. After changing this, click ↓ Deps to install packages into the new environment. Click Create venv to automatically create a virtual environment at %APPDATA%\CatiaMenuWin32\venv — the path field is updated automatically on success. |
| Script Cache Folder | Where downloaded scripts are stored locally. Defaults to %APPDATA%\CatiaMenuWin32\scripts. |
| GitHub Token | Optional Personal Access Token. Increases the API rate limit from 60 to 5,000 req/hr and is required for private repositories. Tick Use token and paste the token. See GitHub Token. |
Sync tab
| Option | Default | Description |
|---|---|---|
| Sync scripts automatically on startup | On | Downloads latest scripts when the app starts |
| Always download latest before running | Off | Re-downloads the script every time before running |
| Check for app updates on startup | On | Notifies you when a newer version is available |
| Auto-install updates | On | Downloads and installs new versions automatically; also applies when triggering Help → Check for Updates… manually |
| Auto-refresh every N hours | 6 | Background sync interval in hours; 0 = disabled |
| Show cached scripts when offline | Off | Display previously synced scripts when there is no internet connection; an amber status bar warning is shown. When off, no buttons appear if the sync cannot reach GitHub |
Console tab
| Option | Default | Description |
|---|---|---|
| Show Python console window | Off | Opens a visible console when running scripts |
| Keep console open after script finishes | On | Window stays open so you can read output/errors (cmd /k mode) |
| Keep Update Deps console open | Off | Keeps the dependency install window open until you close it |
| Repeat script on double-click (main window) | On | Enable repeat mode for scripts in the main window |
Window tab
| Option | Default | Description |
|---|---|---|
| Always on Top | On | Keep the main window above other applications |
| Minimize to Tray | On | Hide to system tray instead of taskbar when minimised |
| Start with Windows | On | Launch automatically at login |
| Start Minimized | On | Start hidden in the tray |
| Theme | System | Dark, Light, or follow Windows setting |
| Sort Scripts | Default Order | Default, Alphabetical, By Date, or Most Used |
Quick Bar tab
| Option | Default | Description |
|---|---|---|
| Enable Quick Launch Bar | On | Show the floating icon toolbar |
| Orientation | Vertical | Vertical (column) or Horizontal (row) |
| Stay on Top with Target App | On | Auto-elevate bar when target app is in the foreground |
| Target App | CATIA V5 |
Window-title substring to track; leave empty for always-visible bar |
| Target Exe | CNEXT.exe |
Process executable filename to match alongside Target App. Click Browse… to pick the .exe from a file dialog instead of typing it. Leave empty to match any process. |
| Repeat script on double-click (Quick Bar) | On | Enable repeat mode for Quick Bar buttons |
Reset to Defaults
The Reset to Defaults button at the bottom left resets all settings to their original values. Your script sources (extra repos and local folders) are not affected.
Export / Import Settings
Two buttons in the bottom button row let you back up and transfer your configuration selectively.
Both open a selection dialog divided into three sections:
General settings — three independent checkboxes:
- Python path — machine-specific; uncheck when sharing with other users.
- Cache folder — machine-specific; uncheck when sharing.
- Options, theme, window & Quick Bar — portable preference settings, safe to share.
Extra Repositories and Local Folders — each item has its own checkbox so you pick exactly which sources to transfer.
Tokens — one checkbox per available token (GitHub account token and individual repo tokens). Uncheck any tokens you do not want to include.
Export…
- The selection dialog appears — all items checked by default.
- Uncheck anything you do not want to export. Uncheck individual tokens to keep sensitive credentials out of the file.
- Choose a destination
.inifile.
Import…
- Choose the source
.inifile. - The selection dialog appears showing what is available in that file — all items checked by default.
- Uncheck anything you do not want to add. Selected repos and folders are appended to your current sources — nothing is removed or replaced.
- If a repo URL already exists in your config and the imported entry carries a token, you are prompted to keep the existing or imported token. Exact duplicate paths with no token conflict are skipped silently.
- Settings take effect immediately and the dialog closes. Your
prefs.ini(favourites, notes, run counts) is never affected.
Tip: To share only your portable preferences, uncheck Python path and Cache folder before exporting. The recipient gets your options, theme, and Quick Bar settings without machine-specific paths.
Script Sources
Open via ☰ Menu → File → Sources…
CatiaMenuWin32 can load scripts from three types of sources simultaneously:
Built-in Repository
The KaiUR/Pycatia_Scripts repository is the default primary source. If you want to use the app with your own scripts only — or as a general Python script launcher unrelated to CATIA — you can disable it:
- Open ☰ Menu → File → Sources…
- At the top of the dialog, uncheck Enable built-in repository (KaiUR/Pycatia_Scripts)
- Click OK
- Click ↺ Refresh — the built-in scripts are removed from all tabs immediately
The built-in repository is not deleted from your cache, just hidden. Re-check the box and refresh to restore it at any time.
Additional GitHub Repositories
Add any GitHub repository that uses the same folder structure (subfolders contain .py files):
- Click Add… under “Additional GitHub Repositories”
- Enter the full URL:
https://github.com/owner/repo - Enter the branch name (defaults to
main) - Optionally add a token for private repos or higher rate limits
- Click OK
If two repositories have a folder with the same name, their scripts are merged into one tab.
To enable or disable a repo without removing it, select it and click Enable/Disable.
To remove a repo, select it and click Remove — you will be asked to confirm and given the option to delete its cached files.
Local Script Folders
Add a folder on your machine that contains subfolders with .py files:
My_Scripts/
├── Any_Document_Scripts/
│   └── my_script.py
└── Part_Document_Scripts/
    └── another_script.py
- Click Add… under “Local Script Folders”
- Browse to your folder and click OK
Local scripts run directly from disk — no downloading or SHA checking. A setup/ subfolder is never shown as a tab — it is used for dependencies only.
Update Dependencies for Sources
If a source has a setup/requirements.txt file, clicking ↓ Deps will run pip install --upgrade pip && pip install --upgrade -r requirements.txt for each source separately in order:
- Main repo requirements
- Each extra GitHub repo’s requirements
- Each local folder’s requirements
Update Dependencies
Click ↓ Deps (or ☰ Menu → Run → Update Dependencies) to install Python packages required by the scripts.
The app runs pip install --upgrade pip && pip install --upgrade -r requirements.txt for each configured source that has a setup/requirements.txt file. Each source runs in its own console window sequentially.
Enable Keep Update Deps console open in Settings to keep each window visible until you close it manually.
Quick Launch Bar
The Quick Launch Bar is a small floating button bar that gives you one-click access to your favourite scripts without switching to the main window.
Enabling the bar
Go to ☰ Menu → View → Quick Bar → Enable Quick Bar, or right-click the bar itself and tick Enable Quick Bar.
Buttons
Each button represents one script from your ⭐ Favourites tab. The button face shows the first two uppercase letters of the script name. Hover over a button to see the full script name and its Purpose line in a tooltip. Click to run the script.
If you have more favourites than fit in the bar, ▲ ▼ (vertical) or ◄ ► (horizontal) scroll arrows appear at the edges. You can also scroll with the mouse wheel.
Moving the bar
Drag any empty area of the bar (between buttons) to reposition it anywhere on screen. The position is saved automatically to settings.ini.
Orientation
Switch between vertical and horizontal layouts via ☰ Menu → View → Quick Bar or the right-click context menu. The bar resizes automatically.
Always on top with the target app
When On Top with Target App is enabled, the bar rises to always-on-top whenever the configured target application gains focus, and drops back to normal z-order when any other window comes to the front. This lets the bar float above your target app without covering unrelated windows.
The bar also tracks the target application’s state:
- Target app visible — bar shown normally
- All target windows minimised — bar hides automatically and reappears when any window is restored
- Target app not running — bar hides automatically; it reappears when the app is launched and a visible window is detected
Setting the target app
By default the target is CATIA V5. To use the bar with a different application:
- Right-click the bar and select Set Target App… (or ☰ Menu → View → Quick Bar → Set Target App…)
- Enter any substring that appears in the target application’s window title (e.g.
Fusion 360,Blender,SolidWorks) - Optionally enter the Target Exe — the process executable filename (e.g.
CNEXT.exe) — to prevent the bar from responding to other windows whose titles contain the same substring. Click Browse… to navigate to the executable with a file picker instead of typing the name manually - Click OK
To disable target tracking entirely — keeping the bar always visible with no topmost behaviour — clear both fields and click OK.
Right-click menu options
| Option | Description |
|---|---|
| Enable Quick Bar | Toggle the bar on or off |
| Horizontal / Vertical | Switch orientation |
| On Top with Target App | Toggle topmost-with-target behaviour (greyed out when no target is set) |
| Set Target App… | Enter the window-title substring to track |
| Reset Position | Move the bar back to its default position (right edge of screen) |
| Repeat on Double-Click | Toggle repeat mode for Quick Bar buttons |
Repeat Script on Double-Click
Repeat mode lets a script re-run automatically each time it finishes, without any further input.
Starting repeat mode
- Double-click a script button in the main window, or double-click a Quick Bar button.
- The button turns amber — the border, left accent bar, label text, and the loop symbol ↻ are shown in yellow/amber — so you always know which script is looping.
- The status bar shows: Repeat: <script name> • Esc or click to stop
Stopping repeat mode
| Action | Result |
|---|---|
| Press Escape | Cancels repeat and stops the currently running background script |
| Single-click the same script | Cancels repeat; no extra run is triggered |
| Single-click a different script | Cancels repeat and runs the new script once |
| Click ■ Stop | Cancels repeat and stops the current run |
Toggling the feature
- Main window: ☰ Menu → Run → Repeat Script on Double-Click (checkmark indicates state), or Settings → Console → Repeat script on double-click (main window)
- Quick Bar: right-click the bar → Repeat on Double-Click, or ☰ Menu → View → Quick Bar → Repeat on Double-Click, or Settings → Quick Bar → Repeat script on double-click (Quick Bar)
Both toggles are independent and default to On.
Note: Repeat mode is not available when Show Python console window is enabled in Settings, because console-mode scripts run attached to a terminal and their completion is not tracked by the app.
System Tray
Enable Minimize to Tray in ☰ Menu → Window to hide the window to the system tray instead of the taskbar when minimised or closed.
- Double-click the tray icon to restore the window
- Right-click the tray icon for a quick menu
Enable Start with Windows to launch the app automatically at login. Combine with Start Minimized to have it start silently in the tray.
Themes
Switch between dark, light, and system-default themes via ☰ Menu → View → Theme:
- System (default) — follows your Windows theme setting automatically
- Dark — always dark regardless of Windows setting
- Light — always light regardless of Windows setting
GitHub Token
The app uses the GitHub REST API to fetch script lists. Without a token, GitHub allows 60 requests per hour per IP address.
A token increases this to 5,000 requests per hour and is required for private repositories.
To create a token:
- Go to GitHub → Settings → Developer settings → Personal access tokens → Fine-grained tokens
- Click Generate new token
- Name it
CatiaMenuWin32 - Set expiry as preferred
- Under Repository access select Public Repositories (read-only)
- Click Generate token and copy it
To add it to the app:
- Open ☰ Menu → File → Settings…
- Tick Use token
- Paste the token
- Click OK
Office / shared network users: If multiple people share the same public IP address, all their requests count against the same 60/hour limit. Each user should set their own token to avoid seeing “Connect to internet to sync” errors.
Writing Your Own Scripts
CatiaMenuWin32 reads metadata from a structured header block at the top of each .py file. This header powers the tooltip shown when you hover over the i badge on a script button.
Header Format
'''
    -----------------------------------------------------------------------------------------------------------------------
    Script name:    My_Script_Name.py
    Version:        1.0
    Code:           Python3.10.4, Pycatia 0.8.3
    Release:        V5R32
    Purpose:        One line summary shown under the script name in the button.
    Author:         Your Name
    Date:           DD.MM.YY
    Description:    Full description of what the script does. This is shown in the
                    tooltip popup. Continuation lines must be indented.
    dependencies = [
                    "pycatia",
                    ]
    requirements:   Python >= 3.10
                    pycatia
                    Catia V5 running with an open document.
    -----------------------------------------------------------------------------------------------------------------------

    Change:

    -----------------------------------------------------------------------------------------------------------------------
'''
Rules
- The header must be inside a triple-quoted string
'''...'''or"""..."""at the top of the file - The dashed separator lines (
-----...) mark the start and end of the header block - Keys are matched case-insensitively:
Script name:,Purpose:,Author:,Date:,Version:,Description: - Purpose — shown as the subtitle line on the script button (keep it short, one line)
- Description — shown in the tooltip; continuation lines must be indented with spaces or tabs
- Parsing stops at the second dashed separator line, or at
dependencies,requirements,import,def, orclass - If no metadata is found the script still appears as a button — just without tooltip details
Folder Structure
Scripts must be organised in subfolders — the subfolder name becomes the tab name:
Your_Repo/
├── Any_Document_Scripts/
│   └── My_Script.py
├── Part_Document_Scripts/
│   └── Another_Script.py
└── setup/
    └── requirements.txt
Folder names use snake_case — the app converts them to title case automatically:
Any_Document_Scripts → Any Document Scripts
PyCATIA
Scripts in KaiUR/Pycatia_Scripts use the PyCATIA library by evereux for automating CATIA V5 via COM. To write your own scripts:
- Install PyCATIA:
pip install pycatia - See the PyCATIA documentation for the full API reference
- CATIA V5 must be running before scripts that interact with it are executed
Setup Folder
If your repository or local folder contains a setup/ subfolder with a requirements.txt, clicking ↓ Deps will automatically install those dependencies:
Your_Repo/
└── setup/
    └── requirements.txt
The setup/ folder is never shown as a tab.
Persistent Data
Never ask users to edit a script to change settings or parameters. CatiaMenuWin32 verifies the SHA hash of every downloaded script against GitHub before running it. A script that has been locally modified will fail the integrity check and the app will refuse to run it. All user-configurable data must be stored outside the script file.
Store settings in a per-script folder under %APPDATA%\pycatia_scripts\:
%APPDATA%\pycatia_scripts\<Your_Script_Name>\user_settings.json
Use the script filename (without .py) as the folder name. This keeps each script’s data isolated and easy to locate or clean up.
Implementation pattern:
import os
import json

SETTINGS_DIR  = os.path.join(os.environ['APPDATA'], 'pycatia_scripts', 'Your_Script_Name')
SETTINGS_FILE = os.path.join(SETTINGS_DIR, 'user_settings.json')

# --- Load (in your dialog __init__) ---
hardcoded_defaults = {"my_param": "10.0", "another_param": "5.0"}
settings = hardcoded_defaults.copy()
if os.path.exists(SETTINGS_FILE):
    try:
        with open(SETTINGS_FILE, 'r') as f:
            settings.update(json.load(f))
    except:
        pass  # Fall back to hardcoded defaults on corrupt or missing file

# --- Save (after user clicks OK) ---
if not os.path.exists(SETTINGS_DIR):
    os.makedirs(SETTINGS_DIR)
with open(SETTINGS_FILE, 'w') as f:
    json.dump({"my_param": dlg.my_field.GetValue(), "another_param": dlg.other_field.GetValue()}, f, indent=4)
Rules:
- Always define
hardcoded_defaults— these are factory defaults when no saved file exists - Wrap the file read in
try/exceptand fall back to defaults if the file is corrupt - Create the directory before writing: use
os.makedirs()after checking it does not exist - Save only on successful completion (OK), not on cancel or error
- Include a Clear Saved button in dialogs that saves settings, so users can return to factory defaults without touching any files
❓ In-App Help
Press F1 or go to ☰ Menu → Help → Help Contents to open the built-in help window.
The help window has a topic list on the left and formatted content on the right. A coloured header strip above the content shows the current topic name at a glance. Click any topic to navigate to it. The window is resizable and stays open while you work.
⌨️ Keyboard Shortcuts
| Shortcut | Action |
|---|---|
F1 |
Open Help |
F5 |
Refresh + Sync |
F9 |
Run last script |
Ctrl+Tab |
Next tab |
Ctrl+Shift+Tab |
Previous tab |
Escape |
Cancel repeat mode and stop running script (when active) |
Troubleshooting
“Connect to internet to sync”
- Check your internet connection
- You may have hit the GitHub API rate limit — set a token (see GitHub Token)
- Corporate firewalls may block
api.github.com— contact your IT department
Script fails with “Python Not Found”
- Open ☰ Menu → File → Settings…
- Click Browse… next to Python Interpreter and locate
python.exe
Scripts fail after setting up a virtual environment
- Make sure the Python Interpreter in Settings points to
python.exeinside the venv’sScriptsfolder, not the global Python executable - Click ↓ Deps after pointing to the venv so all required packages are installed into it
- The venv does not need to be activated in a terminal — the app calls the Python executable directly by full path
SHA mismatch warning
- The local cached script differs from what GitHub expects
- Click Yes when prompted to re-download the script
- If it persists, delete the cache folder in Settings and re-sync
Update prompt on local builds
- Local builds pick up the latest release tag via git
- Pull the latest tags with
git fetch --tagsand rebuild - The local build number will be one higher than the release and no prompt will appear
A script has disappeared
- It may have been hidden — check ☰ Menu → File → Manage Hidden Scripts
- If using a filter, clear the search box
Scripts don’t appear after adding a source
- Click ↺ Refresh to trigger a sync with the new source
- Check the Sources dialog to confirm the source is enabled